Vegan Savoury Crackers GF
These Gluten Free Seed Crackers, came from Veet of Veet’s Vegan Cooking School.
These are fantastic and in line with only publishing tried and trusted recipes I have derived myself or recipes that I have tweaked from elsewhere (with appropriate credit of course), these are a like Ronseal product, “does what it says on the tin”.
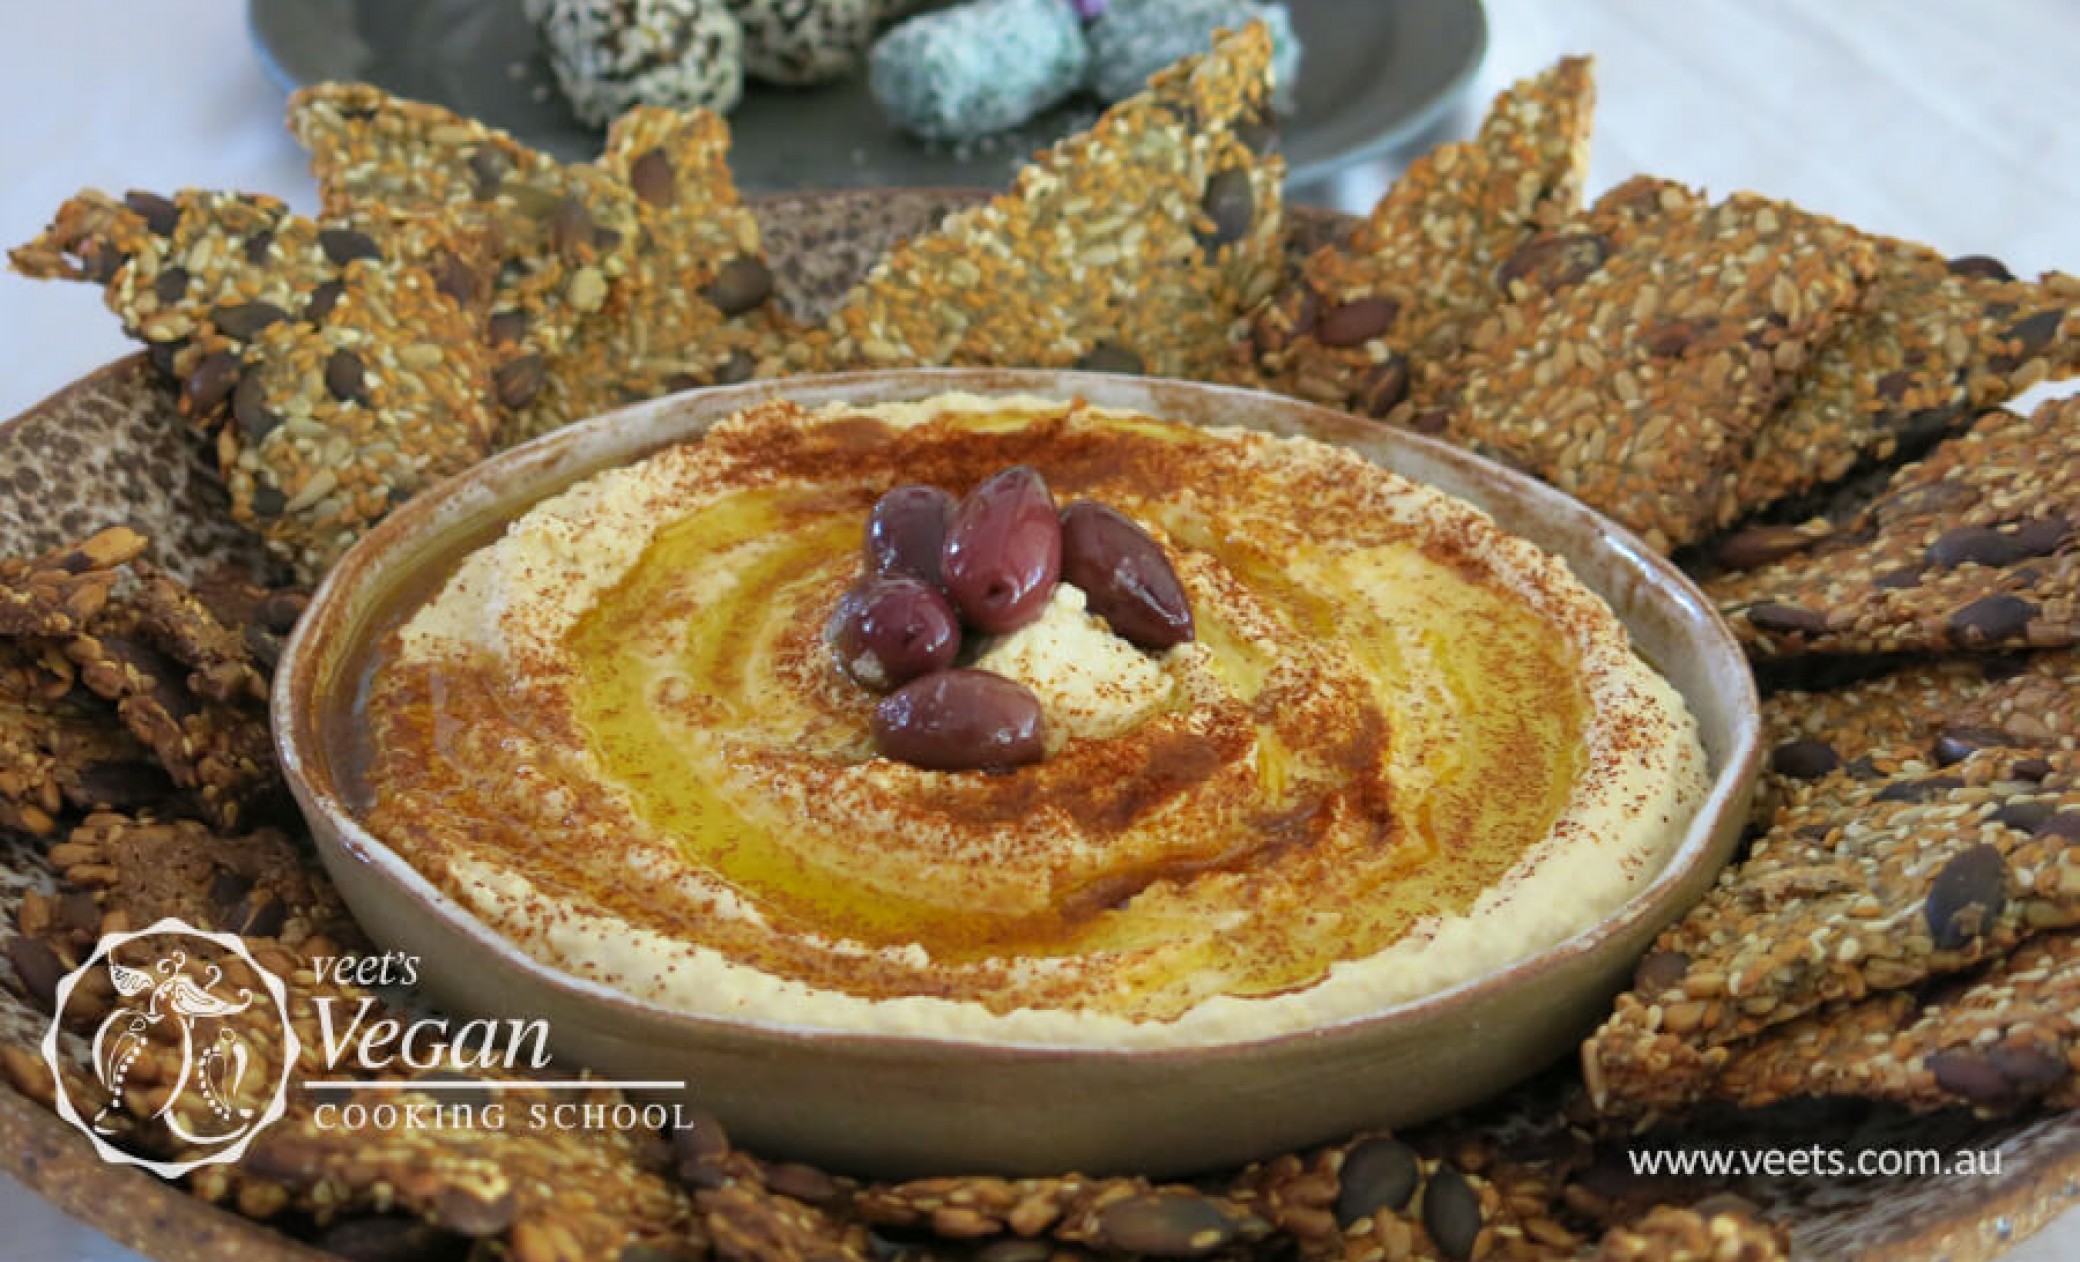
These are fantastic, crispy, savoury and versatile and a must have pantry staple. As per Veet’s blog, this also reduces plastic and packaging waste.
We used to buy allot of biscuits to have around for when people dropped in, with that, some cheese and cured meats as well. Water crackers, seed crackers, biscuits, pumpkin flavoured, rosemary flavoured, we had the full range. So the cheese and meats are gone but the dips are not (Plant Based of course).
One of the things you become quite aware of on becoming WFPB and or Vegan is the processed nature of foods and packaging. How much plastic and and cardboard we bring into our homes. It’s quite scary really and biscuits/crackers are no exception as the packets are relatively small so a mass of them don’t go stale when you open them, I get it but wow it’s allot of packaging.
Also consider most plastics are derived from fossil fuels (coal, crude oil etc.) although there are some Plant Based plastics coming onto the market, most are still derived from a fossil fuel base.
Then there are the ingredients in commercial products. Many of these are here for shelf life, transportation, mouth feel, texture and durability but there are so many additives in many cases, oil being a big one, that you do really start to pull back and think, do I really want that in my body? Do I need that in my body? Well we found out that we don’t need animals or animal products in there, so maybe we don’t need Flavour Enhancer 621 in there as well or Palm Oil.
These crackers don’t have any of that and are also very adaptable, you can change the flavour, seed types etc. to suit yourself, they are quite forgiving.
Better yet, they are portable. Whether you make them up beforehand or assemble the mix (without the water) for later, they are great for taking anywhere if you will be away from home.
I like to make up bags of mixture and take them with us when we go away, writing on the outside how much water is needed. You only need a tray and an oven wherever you are staying, be it the outlaws, inlaws or a holiday house. If you’re camping then maybe you need to make them beforehand unless maybe you are glamping and then maybe you do have an oven.
GLUTEN FREE SEED CRACKERS RECIPE
For me, the cooking time has always been longer than the original 20 + 15 minutes. Maybe I have a rubbish oven, I wouldn’t have thoughts so as it is a Bosch and it cost me a bit of money but it has never really impressed me, so maybe it’s just me or my oven. Keep an eye on them and once you do a batch successfully in your oven you will know what times work for you. They are also a bit forgiving in that they just get crispier and browner so, you know, don’t let them get to brown…. or black.
Cracker Ingredients
- 3/4 cup sunflower seeds
- 3/4 cup pepitas
- 3/4 cup linseed (flaxseed)
- 4 1/2 tbsp sesame seeds
- 4 1/2 tbsp chia seeds
- 1 1/2 cups water
- 1 tsp salt
Base Flavour
- 1/2 cup nutritional yeast
- 1 1/2 tsp garlic powder (optional); or
- 1 1/2 tsp onion powder (less pronounced)
METHOD
Making the crackers
- Set oven to 180 deg C
- Place all ingredients into a bowl and mix well by hand.
- Let sit for 20-30 minutes. This allows the water to soak in to the linseed and chia seeds. These two are used as a binder to replace eggs in WFPB and vegan cooking. The mix binds and get stickier. Stir occasionally to get any standing water mixed in.
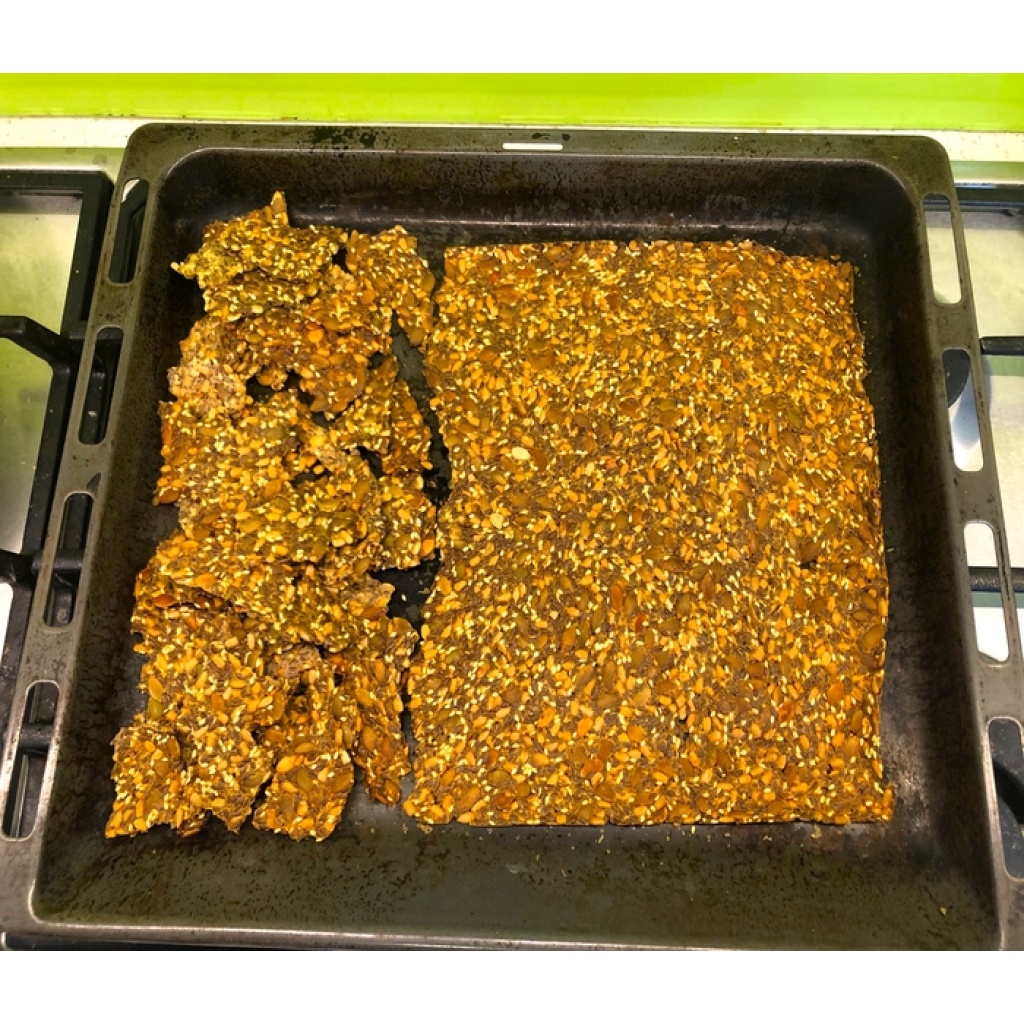
- Prepare some oven trays with baking paper, I generally get 2 1/2 full sized oven pans out this.
- Spread the mix over the oven trays. I use the back of a spoon to spread it out. You need to get this as thin as possible to achieve the desired crispiness.
- Spread it such that you occasionally see the paper underneath and fill these holes back in as you go, this lets you know you are basically 1-2 seeds thick. By using the back of the spoon you can get a bit of a bow wave and move the mix around from place to place. If you end up with excess mix on one tray, move it to another tray.
- You can set break lines in now if you want, either standard squares or rectangles or angled lines to create diamonds or similar. This isn’t necessary if you want a rustic random shaped cracker in the end like I do.
- Bake in the oven for 20 minutes. Check the sheet, I still have a bit of moisture at this point so need to let it go for 5-10 minutes.
- My marker as to when this is done is I can remove the trays from the oven, flip the cracker mix and paper over and peel the paper off. Flip the crackers sheet over on the paper and return to the oven for 15-20 minutes. Sometimes its a bit moist toward the center, could by oven, I return them paper side up tot he oven for 5 or minutes to reduce the moisture a bit more.
- They might start to brown around the edges which is telling you they are basically done and getting ready to burn. The sheet won’t be crispy when you take it from the oven at this point. Let it sit and cool for 5-10 minutes.
- When the crackers have cooled slightly, start breaking them by hand. The crackers sheets will break randomly, you can provide a reasonable amount of control to where it breaks but it makes lots of nice crumbs you can eat.
- If you scored lines in then it will be neater and more geometric.
- Store in an airtight container. If exposed to the air they will absorb moisture and go from being super crisp and crunchy to a bit more limp, less crisp.
Alternate Flavour Ideas
You could ditch the garlic/onion powder and nutritional yeast and sub in alternates. Rosemary is good, dried basil goes well or Italian herb mix.
- 1 1/2 tsp dried basil; or
- 2 tsp fresh finely chopped rosemary (crosscut like really fine); or
Veets Mexican Style
- 1 1/2 tsp onion powder
- 1/2 cup nutritional yeast
- 2 tsp dried oregano
- 2 tsp smoked paprika
- 2 tsp ground cumin
- optional chilli flakes
Ingredient Notes
- If you had less Pepitas or Sunflower seeds you can alter the ratio just keep the volumes about the same, you could sub in Pine Nuts although Pine Nuts are a bit problematic in that they are thicker than the thinness you are generally after when you smear this out for cooking so you have to work around them to get the rest of the layer as thin as possible.
- Pepitas are pumpkin seeds but a specific type so don’t throw in any pumpkin seeds you might have around from a pumpkin you’ve drawn and quartered. They are green in colour.
- Linseed – The original called for flax seeds which for the most part are the same thing generally although they are technically different, either or, whatever you have to hand or can buy, they might be the same thing labelled differently where you are. Sometimes you will see whole seeds for sale as flaxseed and the same thing ground as linseed. You don’t see ground flaxseed.
- Nutritional Yeast – That cheesy weird flake stuff that only vegans know about, pretty available in major supermarkets in the health food or alternate food section.
NOTES
- Ovens vary, you will get the feel of yours. My seems to have a great seal that traps moisture in, I’ve never found this to be a good thing when I get my eyebrows steamed off whenever you open the oven. I find it effects cooking things like this as well.
- I make bigger batches and bag it up so it is easy to make on the spur of the moment or take travelling with you.
You must be logged in to post a comment.